Mechanical testing
Testing mechanical properties
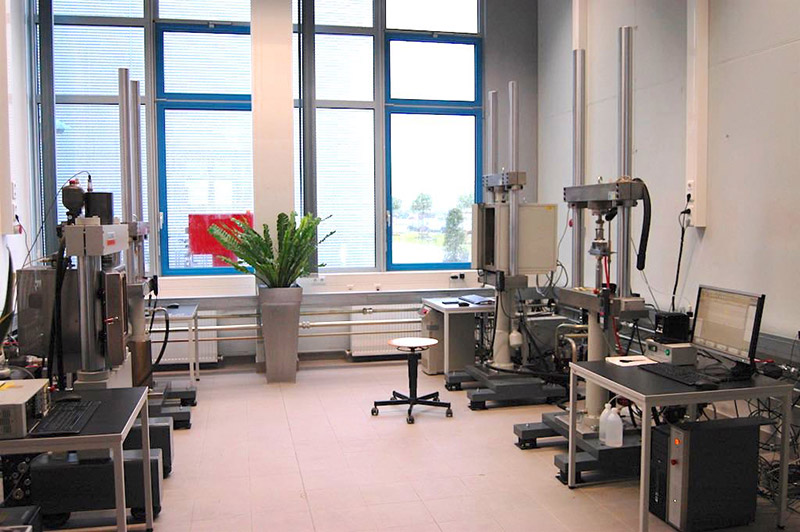
In addition to the classic test methods, in which load is applied to the test specimens quasi-statically, our internally standardised test arrangements enable us to carry out the same tests on servo-hydraulic testing machines. This makes it possible, for example, to make determinations on the fatigue strength of materials.
The available testing machines are equipped with various force sensors and displacement measuring systems as well as temperature chambers in order to cover the widest possible range of tasks. Tests can be carried out on standardised specimens as well as on components. For special problems, new testing concepts can be developed in cooperation with our research workshop or with other departments.

Ansprechpartner: Dipl.-Ing. Andreas Mainz
Telefon: +49 921 55 7561
Mail: andreas.mainz@uni-bayreuth.de
Hardness testing head, Zwick
Maximum load [kN] 2.5
Maximum controllable load [N] 2
Maximum penetration [mm] 3
Test temperature [°C] RT
Test methods
Universal hardness according to DIN 50 359
Ball indentation hardness according to DIN 53 456
Location: University of Bayreuth / Testing Centre – Gottlieb Keim Str. 60 – 95448 Bayreuth
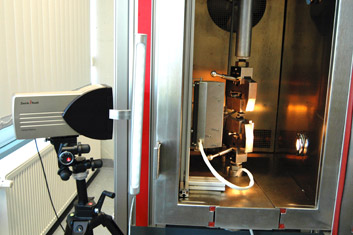
VideoXtens – contactless measurement system
VideoXtens measures tensile and compressive deformations on all types of plastics, metals, rubber, composites, and foils without contact and in high resolution. It is also suitable for determining change in width, the r- & n-value according to ISO 10113 and ISO 10275, and proof stresses in the tensile test according to EN 10002-1.O 10113 und ISO 10275 und der Dehngrenzen im Zugversuch gemäß EN 10002-1.
- It is the ideal measuring system for strain measurement on whipping materials (safety belts, steel cables, rubber ropes, etc.).
- The flexible illumination system (incident light / transmitted light) can be optimally adapted to the respective testing task
- Suitable for use with temperature chamber with plane-parallel glass insert and heatable pane
- Resolution and measuring accuracy is high over the entire image size
- Both length and width change measurement are possible at the same time. No separate marking is required for measuring change in width. Width can be determined at one or more points
- Measurement paths are variable and, depending on the choice of image size or lens, very large
- Automatic measuring mark recognition and acquisition of the initial measuring length L0
- Optional determination of change in width, the r- & n-value according to ISO 10113 and ISO 10275, and proof stress in the tensile test according to EN 10002-1
- Accuracy class 1 (with field of view ≤ 200 mm) according to EN ISO 9513 and accuracy class 2 according to EN ISO 9513 (with 8 mm lens or field of view > 200 mm).
- The entire test sequence can be followed on screen, the video sequence can be saved for subsequent evaluation.
Location: University of Bayreuth / Testing Centre – Gottlieb Keim Str. 60 – 95448 Bayreuth

Laser extensometer, Fiedler Optoelektronik P-50
Scan area [mm] 50
Working distance [mm] 200
Measuring rate [Hz] 50, 200
Measuring time per scan [ms] 5
Resolution [µm] 0.1
Location: University of Bayreuth / Testing Centre – Gottlieb Keim Str. 60 – 95448 Bayreuth
Universal test machine Zwick 1455
Maximum load [kN] 20
Maximum travel [mm] 1500
Test speed [mm/min] 0.01 … 1000
Test temperature [°C] RT
Prüfmethoden
Tensile, compression, bending, hysteresis, creep, relaxation test, determination of fracture mechanical parameters, interlaminar energy release rate
Features
- macro displacement transducer (lo 10 mm – 100 mm, le = 50 mm)
- other force sensors: 500 N to 20 kN
- analogue signal outputs (± 10 V)
- one analogue input ( ± 10 V)
- contact extensometer
- multi-channel measuring amplifier
Location: Polymer Engineering Bayreuth
HDT Vicat heat deflection temperature meter Ceast
It is used to characterise the behaviour of plastics at high temperatures and measures heat deflection temperature (HDT) the Vicat softening temperature (Vicat).
Temperature range [°C] 20 … 300
Temperature accuracy [°C] 0.1
Heating rate [°C/min] 3
Measurement types
HDT, Vicat
Location: Polymer Engineering Hamburg
Universal test machine Zwick Z2,5
Maximum load [kN] 2.5
Maximum test path [mm] 850
Test speed [mm/min] 0.1 … 800
Test temperature [°C] RT
Test methods
Tensile, compression, bending, hysteresis, creep, relaxation test, determination of fracture mechanical parameters, interlaminar energy release rate
Features
Various contact extensometers, inductive extensometers, additional force sensors (2N to 2.5 kN)
Location: University of Bayreuth / Testing Center – Gottlieb Keim Str. 60 – 95448 Bayreuth
Universal test machine Zwick 1475
Maximum load [kN] 5 or 100
Maximum test path [mm] 350
Test speed [mm/min] 0.01 … 500
Test temperature [°C] -70 .. 250
Test methods
Tensile, compression, bending, hysteresis, creep, relaxation test, determination of fracture mechanical parameters, interlaminar energy release rate
Features
Macro displacement transducers (l0 10 mm – 100 mm, le = 50 mm), various contact extensometers, inductive extensometers
Location: University of Bayreuth / Testing Centre – Gottlieb Keim Str. 60 – 95448 Bayreuth
Universal test machine Zwick 1485
Maximum load [kN] 5 or 250
Maximum test path [mm] 700
Test speed [mm/min] 0.01 … 500
Test temperature [°C] RT
Test methods
Tensile, compression, bending, hysteresis, creep, relaxation test, determination of fracture mechanical parameters
Features
Macro displacement transducer (l0 10 mm – 100 mm, le = 50 mm), one additional sensor (force, displacement measurement)
Location: University of Bayreuth / Testing Centre – Gottlieb Keim Str. 60 – 95448 Bayreuth
Universal test machine Zwick Z020
Maximum load [kN] v20
Maximum test path [mm] 1700
Test speed [mm/min] 0.001 … 1250
Test temperature [°C] -50 .. 250
Test methods
Tensile, compression, bending, hysteresis, creep, relaxation test, determination of fracture mechanical characteristic values, interlaminar energy release rate, temperature ramp possible in test chamber
Features
Macro displacement transducers (l0 10 mm – 100 mm, le = 50 mm), various contact extensometers, inductive extensometers, additional force sensors (2N to 20 kN)
Location: University of Bayreuth / Testing Centre – Gottlieb Keim Str. 60 – 95448 Bayreuth
Universal test machine Zwick Z050
Maximum load [kN] 50
Maximum test path [mm] 1700
Test speed [mm/min] 0.001 … 400
Test temperature [°C] 20
Test methods
Tensile, compression, bending, hysteresis, creep, relaxation test, universal hardness, ball indentation hardness
Features
Multi-channel measuring amplifier incl. data acquisition software
Additional force sensors (2N to 50 kN)
Location: University of Bayreuth / Testing Centre – Gottlieb Keim Str. 60 – 95448 Bayreuth
Contact: Dipl.-Ing. Alexander Brückner
Phone: +49 921 55 7561
Servo-hydraulic testing machine (SCHENCK PL10M10l)
Maximum load [kN] ± 10 (static), ± 8 (dynamic)
Maximum test path [mm] 50
Maximum test frequency [Hz] 300
Test temperature [°C] RT bis 250
Test media
Air, (salt)water, oil, etc.
Test methods
Tensile, compression, and bending fatigue tests, hysteresis measurements, fatigue crack propagation, operating load tests, generation of Wöhler curves
Location: University of Bayreuth / Testing Centre – Gottlieb Keim Str. 60 – 95448 Bayreuth
Servo-hydraulic testing machine (IST IPLH10l)
Maximum load [kN] ± 10 (static), ± 8 (dynamic)
Maximum test path [mm] 50
Maximum test frequency [Hz] 100
Test temperature [°C] RT bis 250
Test media
Air, (salt)water, oil, etc.
Test methods
Tensile, compression, and bending fatigue tests, hysteresis measurements, fatigue crack propagation, operating load tests, generation of Wöhler curves
Location: University of Bayreuth / Testing Centre – Gottlieb Keim Str. 60 – 95448 Bayreuth
Servo-hydraulic testing machine (SCHENCK PL10N)
Maximum load [kN] ± 10 (static), ± 8 (dynamic)
Maximum test path [mm] 250
Maximum test frequency [Hz] 100
Test temperature [°C] RT to 250
Test media
Air, (salt)water, oil, etc.
Test methods
Tensile, compression, and bending fatigue tests, hysteresis measurements, fatigue crack propagation, operating load tests, generation of Wöhler curves
Location: University of Bayreuth / Testing Centre – Gottlieb Keim Str. 60 – 95448 Bayreuth
Servo-hydraulic testing machine (IST PL10N)
Maximum load [kN] ± 10 (static), ± 8 (dynamic)
Maximum test path [mm] 250
Maximum test frequency [Hz] 100
Test temperature [°C] RT to 250
Test media
Air, (salt)water, oil, etc.
Test methods
Tensile, compression, and bending fatigue tests, hysteresis measurements, fatigue crack propagation, operating load tests, generation of Wöhler curves
Location: University of Bayreuth / Testing Centre – Gottlieb Keim Str. 60 – 95448 Bayreuth
Servo-hydraulic testing machine (IST IPLH50K)
Maximum load [kN] ± 50 (static), ± 42 (dynamic)
Maximum test path [mm] 100
Maximum test frequency [Hz] 100
Test temperature [°C] RT to 250
Test media
Air, (salt)water, oil, etc.
Test methods
Tensile, compression, and bending fatigue tests, hysteresis measurements, fatigue crack propagation, operating load tests, generation of Wöhler curves
Location: University of Bayreuth / Testing Centre – Gottlieb Keim Str. 60 – 95448 Bayreuth
Servo-hydraulic testing machine (SCHENCK PL25N)
Maximum load [kN] ± 25 (static), ± 20 (dynamic)
Maximum test path [mm] 250
Maximum test frequency [Hz] 100
Test temperature [°C] RT to 250
Test media
Air, (salt)water, oil, etc.
Test methods
Tensile, compression, and bending fatigue tests, hysteresis measurements, fatigue crack propagation, operating load tests, generation of Wöhler curves
Location: University of Bayreuth / Testing Centre – Gottlieb Keim Str. 60 – 95448 Bayreuth
Servo-hydraulic testing machine (SCHENCK PL16N)
Maximum load [kN] ± 16 (static), ± 13 (dynamic)
Maximum test path [mm] 250
Maximum test frequency [Hz] 100
Test temperature [°C] RT to 250
Test media
Air, (salt)water, oil, etc.
Test methods
Tensile, compression, and bending fatigue tests, hysteresis measurements, fatigue crack propagation, operating load tests, generation of Wöhler curves
Location: University of Bayreuth / Testing Centre – Gottlieb Keim Str. 60 – 95448 Bayreuth
Notched hammer, Zwick / Roell RKP 5113
Maximum energy [J] 50
Drop angle [°] 160
Pendant length [mm] 390
Test methods
Instrumented impact bending test (notched (notch form A) or unnotched) according to Charpy (ISO 179); in addition to the force signal, the angle of rotation of the hammer is recorded;
Features
50 J and 4 J hammer, two test programmes (Impact-Win, testXpert)
Location: University of Bayreuth / Testing Centre – Gottlieb Keim Str. 60 – 95448 Bayreuth
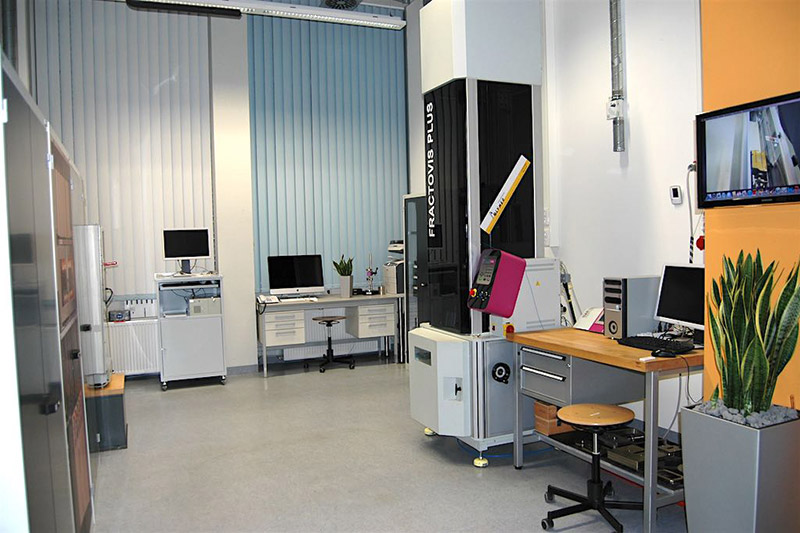
Drop bolt tester, CEAST Fractovis Plus
Energy range [J] 0.6 to 1800
Impact speed [m/s] max. 24
Falling weight [kg] 2 to 70 (in 1 kg steps)
Drop height [mm] 30 to 1100
Test software
CEAST Fracture Mechanics
Special features
Temperature chamber (-70°C to 150°C), anti-rebound device, automatic oil spray device, up to 22 KN drop pin
Fittings
Clamping set for CAI plates, Rotatable sample loader (for 10 samples)
Location: University of Bayreuth / Testing Centre – Gottlieb Keim Str. 60 – 95448 Bayreuth

Creep rupture unit Zwick Kappa 50-SS(6x10KN)
Plastic is increasingly being used as a construction material and must therefore withstand ever greater loads. In addition to static and dynamic tests, creep rupture tests on plastics are therefore becoming increasingly important in research. We use a testing machine from Messphysik – a member of the Zwick Roell Group – to carry out a wide range of tests on plastics.
The determination of the creep behaviour has become indispensable for the development of new materials in the field of plastics. In the testing machine, up to six specimens can be loaded simultaneously for tension, compression, and 3-point bending. The change in material properties over time can be determined both at constant strain (relaxation) and at constant stress (retardation) and under the influence of temperature. In addition to these pure creep loads, different load profiles can also be applied. At Polymer Engineering, a wide variety of materials are tested, such as elastomers, composites, and thermoplastics.
In order to be able to make a statistically reliable statement in the shortest possible time, up to six samples are tested simultaneously in this testing machine. Since a standard test typically takes 33 days (1000h), this is a decisive advantage. In order to further shorten test duration, test results are extrapolated to 1000 hours within a short period.
The deformation of the samples is measured contactless by a video extensometer, both at room temperature and at elevated temperature. For this purpose, the testing machine is equipped with a temperature chamber which allows tests between -50°C and +250°C. With the testXpert® II testing software in combination with the testControl measurement and control electronics, all test sequences and evaluations required can be freely defined..
Maximum load [kN] 6 x 10
Maximum test path [mm] 250
Test speed [mm/min] 0.01 … 100
Test temperature [°C] -50 to 250
Test methods
Tensile, compression, bending, hysteresis, creep, relaxation test, determination of fracture mechanical parameters
Features
6 x optical macro displacement transducers, 2-fold temperature measurement per sample, analogue signal outputs (± 10 V), one analogue input ( ± 10 V)
Location: University of Bayreuth / Testing Centre – Gottlieb Keim Str. 60 – 95448 Bayreuth
Standort: Universität Bayreuth / Testing Center – Gottlieb Keim Str. 60 – 95448 Bayreuth
Contact: Eduardo Szpoganicz da Silva, M. Sc.
Phone: +49 921 55 7565

Cryogenic Universal Testing (100 kN)
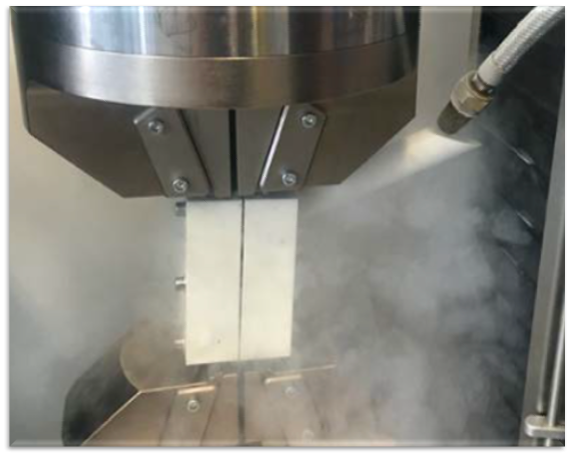
Cryogenic mechanical testing is a type of characterisation that is performed on materials at extremely low temperatures. It involves subjecting a material specimen to tensile forces at cryogenic temperatures, typically below -150°C. At liquid nitrogen environment, these temperatures can reach -196 °C. Cryogenic testing is commonly used to evaluate the mechanical properties of materials that are intended to operate at cryogenic temperatures, such as materials used in aerospace, energy, and cryogenic storage applications.
The purpose of cryogenic testing is to determine the strength, ductility, and toughness of a material at ultra-low temperatures. The test involves loading a specimen of the material in until it fractures or until a predetermined load is reached. The test results are then used to calculate various mechanical properties of the material, such as the modulus of elasticity, yield strength, ultimate tensile strength, and elongation at break. The differential here in comparison with the common mechanical characterisation, is that the tests can be performed fully under liquid nitrogen, therefore in cryogenic environments.
Maximum load [kN] 100
Maximum test path [mm] 500
Test temperature [°C] -196 to RT
Test methods
Tensile, compression, bending
Features
DMS displacement transducers, LN2 source, adjustable testing parameters, Cryogenic Extensometer (Sandner)
Location: University of Bayreuth / Polymer Engineering Department – Universitätstraße 30 – 95447 Bayreuth